Introduction to React
Important
In this exercise, you’re going to get a crash course on the React library by building a simple product registry and voting application.
You will become familiar with the fundamentals of React front-end development and be able to build an interactive React app from scratch!
1. Starting the Application
Note
Begin instructions from within the VM(via VirtualBox) that was configured and run in step 6 of the prerequisites.
Open a new terminal window
- Click on the terminal icon in the left dock
Start the app
Change directory into the
blg/product-registry-01folder on the Desktopcd Desktop/blg/product-registry-01Start the server
npm startExample output:
ajl@x1c:~/Desktop/blg/product-registry-01$ npm start

> product-registry-01@1.0.0 start /home/ajl/Desktop/blg/product-registry-01
> live-server --host=localhost --port=3000 --middleware=./libraries/disable-browser-cache.js

Serving "/home/ajl/Desktop/blg/product-registry-01" at http://localhost:3000 (http://127.0.0.1:3000)
Ready for changes
Chrome should automatically be opened and the application rendered! Otherwise navigate to http://localhost:3000 in your browser. You should see some basic text and your first task!

Note
The
npm startcommand that you executed ran thestartscript in the includedpackage.jsonfile:{ [...], "scripts": { "start": "live-server --host=localhost --port=3000 --middleware=./libraries/disable-browser-cache.js" }, "devDependencies": { "live-server": "https://github.com/acco/live-server/tarball/master" } }This ran a very light-weight server that will host the code for your browser to access. The server will also detect changes in the code base and automatically re-render the browser. Therefore you will not need to restart the server at all during development and every time that you change and save a file the browser will render the updated page for you.
2. Understanding and Updating the Application
Open the application’s code in the Sublime text editor
- Open the Sublime text editor by clicking on the Sublime icon in the left dock.
- From within Sublime open the product-registry-01 folder.
- Click on
Filein the top left corner and selectOpen Folder...in the menu. - Select
Desktop/blg/product-registry-01to open, and we can get to coding!
Open up the index.html file within the product-registry-01 folder
View the contents of the file.
Don’t worry too much about what is being linked within the
<head>of the file, the core to focus on is between the<body></body>tags beneathThe core of the application may be simplified to the following:
<div>
  <h1>Welcome! Your first task, CHANGE ME :)</h1>
  <div id="content"></div>
</div>
- Simply a title
<h1>and one<div>that contains the content of the application. Remember this content<div>as we will see it again soon!Update the title
<h1></h1>where your first task is notedUpdate the title to be your Product registry, for example
Adam's Product RegistryExample Code:
<h1 class="ui dividing centered header">Adam's Product Registry</h1>Save the file! This may be done by selecting the File menu in the top left corner and selecting save, or with the keyboard shortcut
ctrl + s`View the updated title in the browser!

Reverting to a Blank app.js file to get started!
Note within the open
index.htmlfile thatapp-complete.jsis linked in a<script>tag within the<body>Update this to link
app.jsinstead ofapp-complete.js, which is the blank template you will begin with.Don’t forget to save!
Example Code:
<script
  type="text/babel"
  data-plugins="transform-class-properties"
  src="app.js"
></script>
3. Your First Component!
Note
Components
- React components are entirely comprised of components. A component can be thought of as a UI element within an application, generally within your browser.
- Components may be thought of as small self contained building blocks that may effectively be reused and combined within other to build up complete applications.
- The layout, logic, and specific styles are all housed within the given self-contanied component.
Taking a look into app.js and a first component
The remainder of coding for this exercise will occur in the
app.jsfile. Go ahead and open that one up in the Sublime text editor.It should contain the following component:
class ProductRegistry extends React.Component {
  render() {
    return (
      <div className='ui unstackable items'>
        Hello, I am your first React component!
      </div>
    );
  }
}
A React component is simply a JavaScript class, one which extends, or inherits from, the base React Component class
The
Reactobject is availble globally as theReactlibrary was in fact linked in the<head>of theindex.htmlfile:<script src="libraries/react.js"></script>The class, which we will refer to as a component moving forward,
ProductRegistryhas only a single function,render(). This is a required function and is used to determine what the component will render within the browser.However, the return value doesn’t look like traditional JavaScript, and you are right as we are actually using
JSX (JavaScript eXtension syntax), an extension for JavaScript. JSX allows us to write the markup for our component views in a familiar, HTML-esq syntax.Note the familiar looking
<div>section within the return statement. These are the elements that will be rendered in the browser.Also note that although this file is now linked in your
index.htmlit is not currently displayed in the browser. The text “Hello, …” is not present
Rendering your component
You now have your first component defined and it is even linked in your
index.htmlfile… but it is not being rendered on the page… let’s fix that.<script src="app.js"></script>Remember that content
<div>? Yes, we want to render our JSX component within that<div>on our page.Add the following lines at the bottom of your
app.jsfile:ReactDOM.render( <ProductRegistry />, document.getElementById('content') );Save the file and have a look at your browser. Is a warm hello from your component present?
Great, you have rendered your first React component!
ReactDOM is a package that the React library provides to essentially allow direct interaction with the elements defined in your
index.html.Above you told React to locate the element on the current page(document) with the id content and to render the
<ProductRegistry />component within it. Telling React what you want to render and where you want to render it, and voila it appeared beneath your title as is defined in yourindex.html.Effectively resulting in the following:
<div> <h1>Product Registry</h1> <div id="content"> <ProductRegistry /> </div> </div>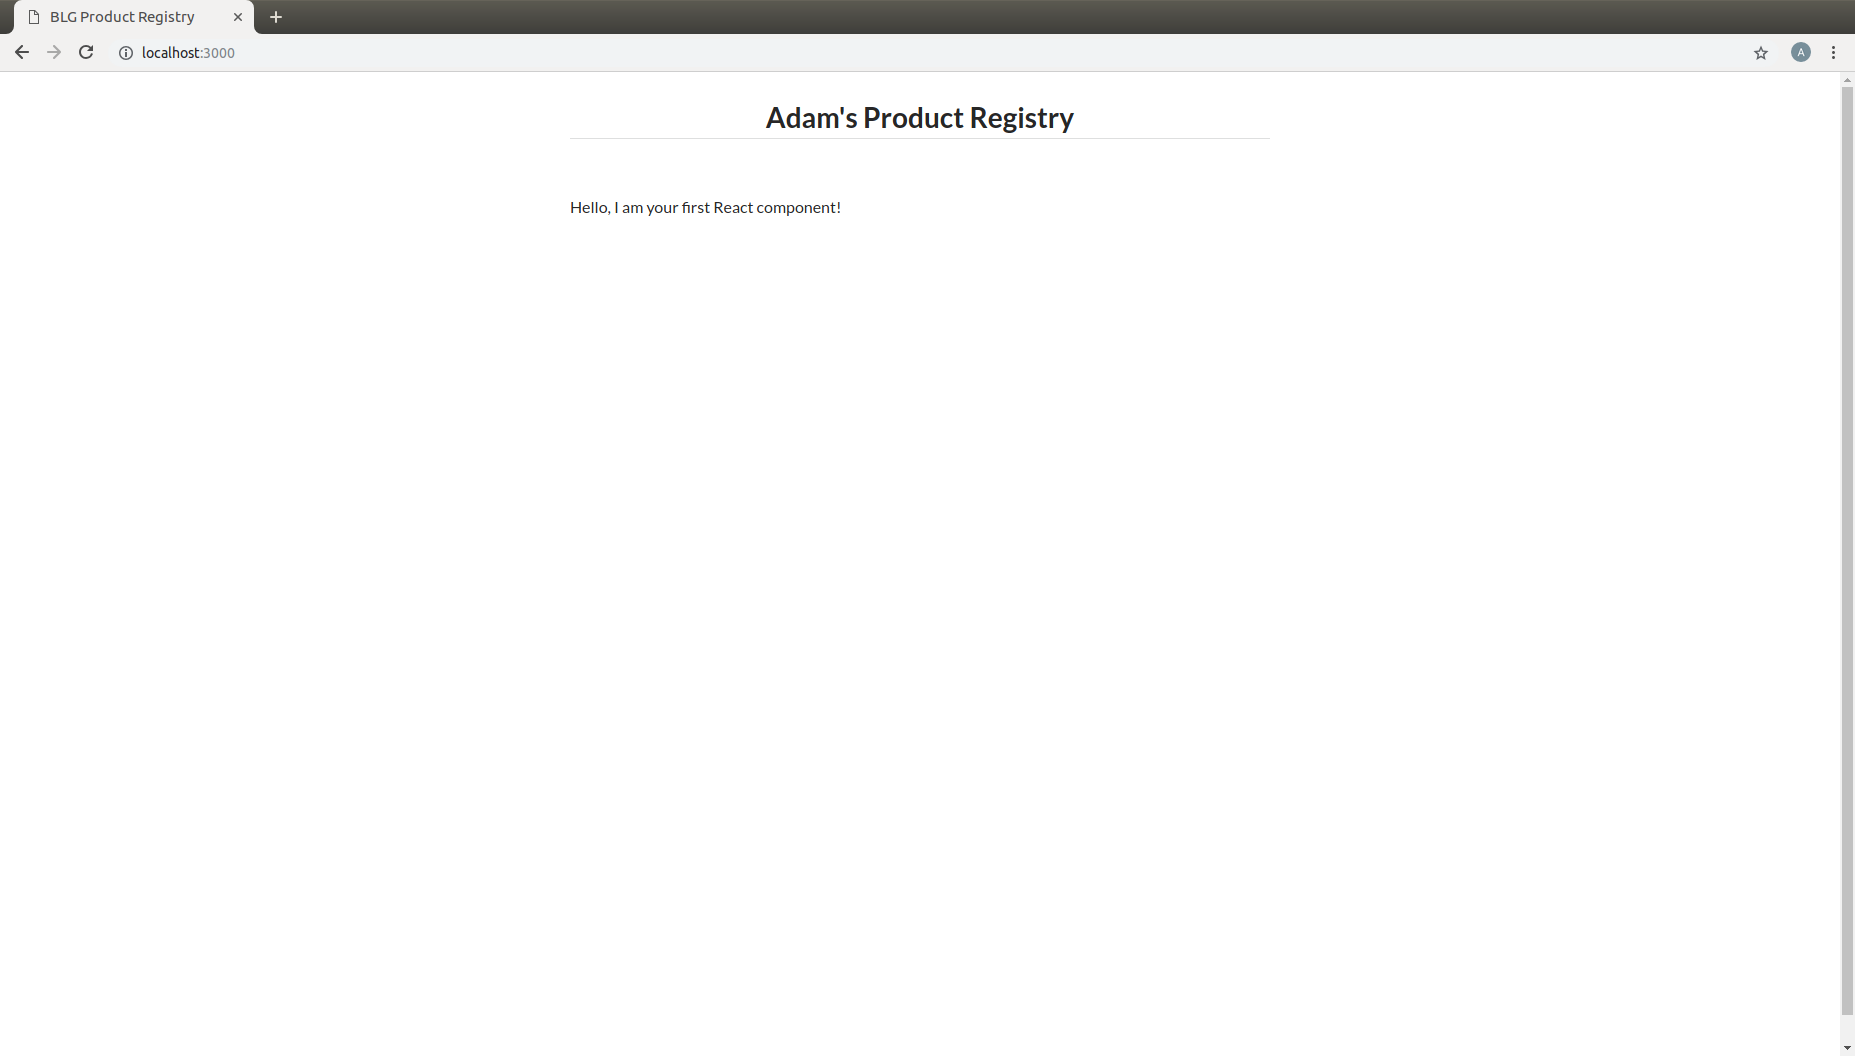
Important
Understanding Babel and how our browser is able to understand your new JSX component.
Modern browsers’ execution engines do not natively understand the JSX language. JSX is an extension to standard JavaScript, which browsers do understand. We therefore need to translate this JSX code to standard JavaScript so our browser can understand it. Essentially your component is speaking Espanol while our browser only understands English.
Babel is here to solve this problem for us!
Babel is a JavaScript transpiler, or in more familiar English language a translator. Babel understands JSX and is capable of translating your JSX into standard JavaScript. You simply need to instruct the browser to use Babel prior to attemtping to execute the JSX code.
The Babel library has been included in your
index.html:<script src="libraries/babel-standalone.js"></script>Finally the browser may be instructed to use Babel directly where the
app.jsfile is linked in yourindex.html:<script type="text/babel" data-plugins="transform-class-properties" src="app.js" ></script>
4. Creating the <Product> Component
Note
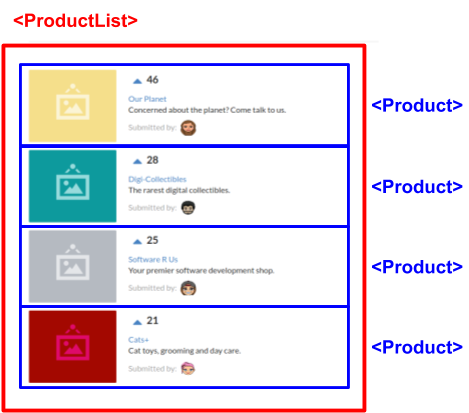
A best practise in designing web application front ends, and especially when utilizing the ReactJS library, is to breakdown the final design into modular, portable and reusable components.
Take a second and think about the components that you could break this up into. Remembering that thus far we have defined the <ProductRegistry>.
- Can the interface be simplified to a
<ProductRegistry>of<Products>? We think so!
Navigate back to your open
app.jsfile in your text editor. It should currently look like this:class ProductRegistry extends React.Component { render() { return ( <div className='ui unstackable items'> Hello, I am your first React component! </div> ); } } ReactDOM.render( <ProductRegistry />, document.getElementById('content') );Begin by defining a brand new component, JavaScript class, beneath the existing
<ProductRegistry>componentclass Product extends React.Component {}This is a completely empty component that will not render anything and in fact will throw an error as a
render()function is required for each component. This is the function that defines what is to be rendered by the browser and by default empty components are not allowed.Add a
render()function to the<Product>component to return a simple<div>saying “hello”class Product extends React.Component { render() { return ( <div>Hello I am a product.</div> ); } }Now remember what is currently being rendered to the page:
ReactDOM.render(
  <ProductRegistry />,
  document.getElementById('content')
);
Therefore the
<Product>component is not being rendered yet and will not be present in the browserAdd the
<Product>component to the components that are returned by your<ProductRegistry>within theapp.jsfileclass ProductRegistry extends React.Component { render() { return ( <div className='ui unstackable items'> Hello, I am your first React component! <Product /> </div> ); } }

5. Building out Your Products
- Great work so far! However, the application is not looking overly interesting just yet. In this section you will build out the
<Product>component.
Note
<a href=”https://react.semantic-ui.com/” target=”_blank”>Semantic UI</a>
is being used as a styling library which has been linked in your index.html file for you. Therefore, the className reference in several of the
elements below are in fact utilizing classes and styling that is provided by Semantic.
Begin by extending the content that is returned by the component in it’s
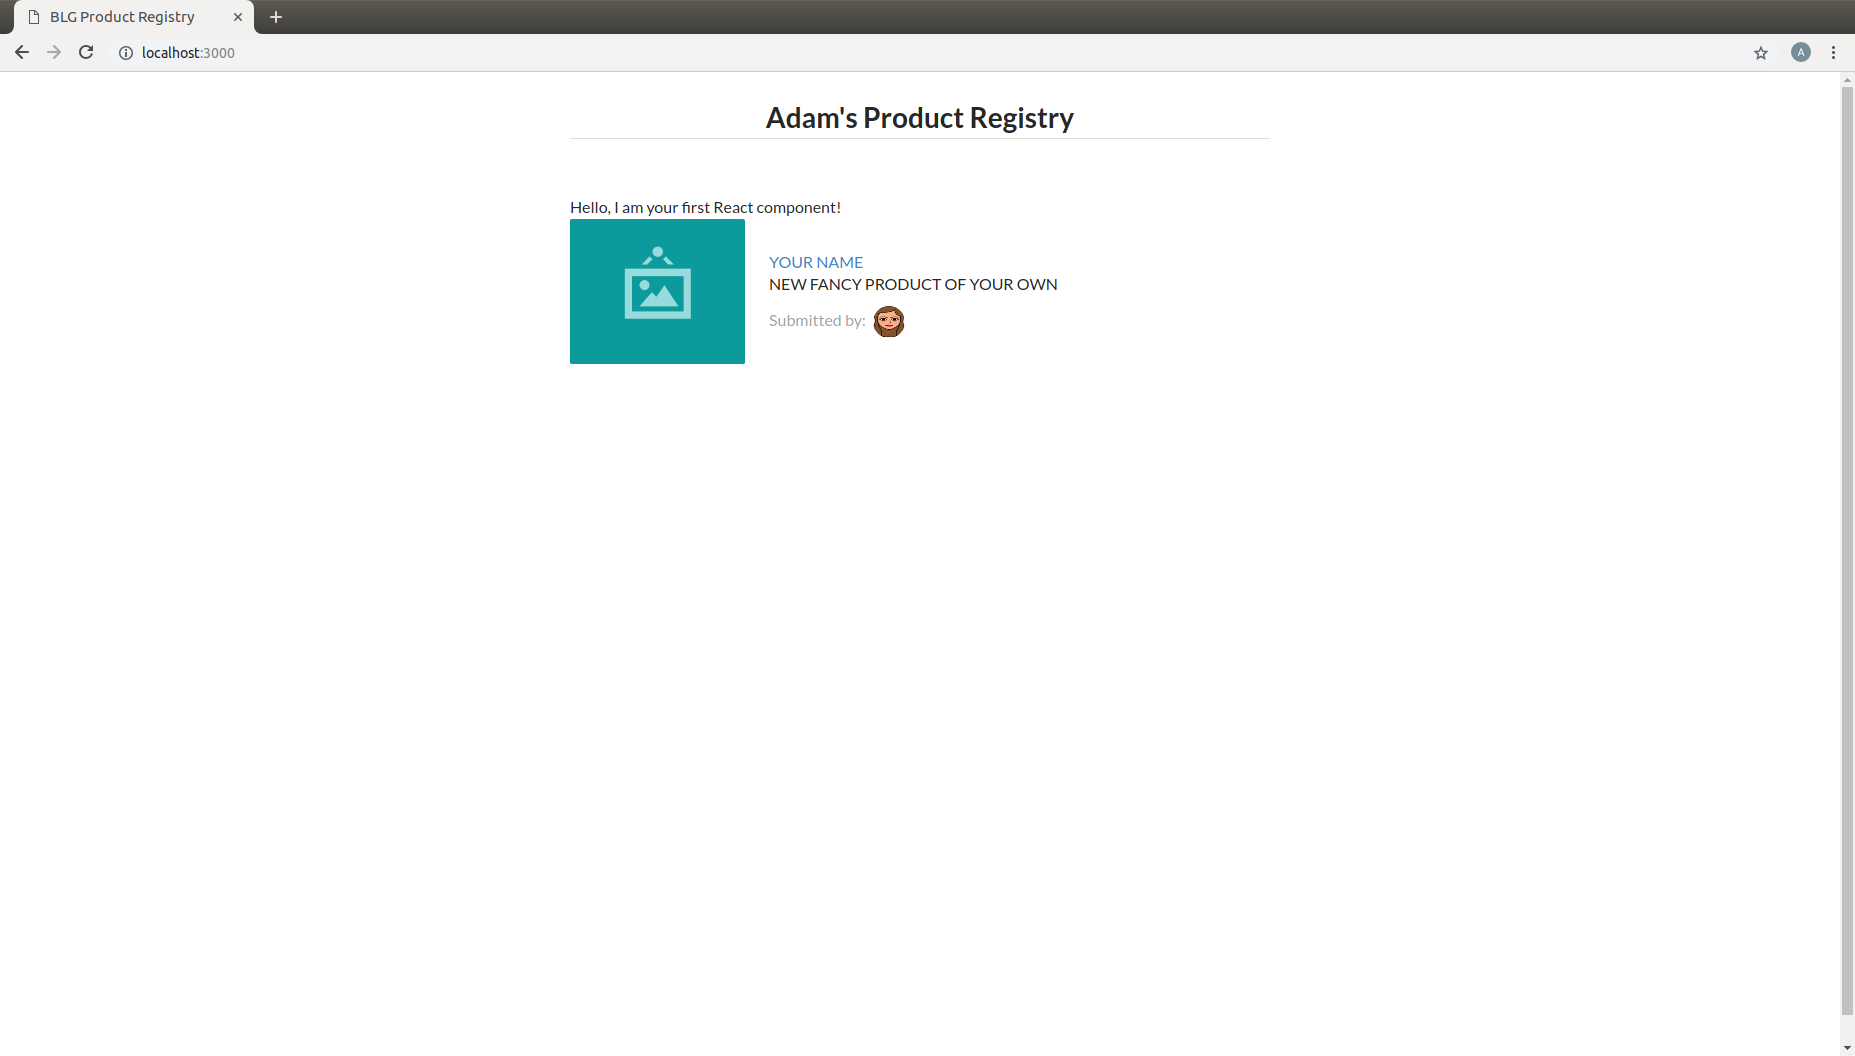
render()function. You will add an image, a title, a description, and an image of who submitted the product.class Product extends React.Component { render() { return ( <div className='item'> <div className='image'> <img src='images/products/image-aqua.png' /> </div> <div className='middle aligned content'> <div className='description'> <a>YOUR PRODUCT NAME</a> <p>NEW FANCY PRODUCT OF YOUR OWN</p> </div> <div className='extra'> <span>Submitted by:</span> <img className='ui avatar image' src='images/avatars/liz.png' /> </div> </div> </div> ); } }The image links in the component above map to the images that have been provided for you within the
/imagesfolder.The product image:
<img src='images/products/image-aqua.png' />and the submitted image:<img className='ui avatar image' src='images/avatars/liz.png' />both exist within their respective foldersimages/products/andimages/avatars/, feel free to add new images of your own and update these paths accordingly!
6. Loading Your Product List
Currently your
<Product>is completely hardcoded and although it may seem quite portable where you can place it just about anywhere, and may create many instances of it, that is where the functionality ends. That<Product>will currently always have the exact same images and text. This section will take you through the process of making the content of your components dynamic and allow them to be passed in as variables!Review your existing
<Product>and have a look at the data fields that are present:- Product Image URL:
<div className='image'>
  <img src='images/products/image-aqua.png' />
</div>
- Product Title:
<div className='description'>
  <a>YOUR PRODUCT NAME</a>
  ...
</div>
- Product Description:
<div className='description'>
  ...
  <p>NEW FANCY PRODUCT OF YOUR OWN</p>
</div>
- Submitted Image URL:
<div className='extra'>
  <span>Submitted by:</span>
  <img className='ui avatar image' src='images/avatars/liz.png' />
</div>
Therefore a minimal representation of the data fields that are required for a
<Product>at this time are:product = { title: 'YOUR PRODUCT NAME', description: 'YOUR PRODUCT DESCRIPTINON.', submitterAvatarUrl: 'images/avatars/adam.jpg', productImageUrl: 'images/products/image-aqua.png', }
Open up the file
seed.jsand have a look around. Observe the definition of the array, or list, of products.Note there are 2 additional fields we did not previously define,
idandvotes, which we will see in action shortly.const products = [ { id: 1, title: 'Digi-Collectibles', description: 'The rarest digital collectibles.', votes: generateVoteCount(), submitterAvatarUrl: 'images/avatars/adam.jpg', productImageUrl: 'images/products/image-aqua.png', }, ... ]
This file defines a list of components that are to populate, or seed, the application when it initially renders. This will take a few steps, first you will need to update your
<Product>component to allow data for it’s fields to be passed in.
Making your <Product> dynamic and data-driven
Note
In order to do this we must introduce another ReactJS concept, that is Props.
Components are allowed to accpet data passed to them from their parents meaning the components that contain them. In your case the parent
is the <ProductRegistry> and it may have many child <Product> s. Therefore the <Product> components may accept data passed to them
by the <ProductRegistry>, and it is this data, passed from parent to child, that is referred to as props. Essentially the input parameters
that a component may accept are referred to as props.
Also this is a special keyword in JavaScript. For the time being we can assume his will be bound to the React component class.
Therefore this.props inside the component is accessing the props attribute on the component class.
Time to update your
<Product>component to accept some props!- Update Product Image URL:
<div className='image'>
  <img src='images/products/image-aqua.png' />
</div>
to >>
<div className='image'>
  <img src={this.props.productImageUrl} />
</div>
- Product Title:
<div className='description'>
  <a>YOUR PRODUCT NAME</a>
  ...
</div>
to >>
<div className='description'>
  <a>{this.props.title}</a>
  ...
</div>
- Product Description:
<div className='description'>
  ...
  <p>NEW FANCY PRODUCT OF YOUR OWN</p>
</div>
to >>
<div className='description'>
  ...
  <p>{this.props.description}</p>
</div>
- Submitted Image URL:
<div className='extra'>
  <span>Submitted by:</span>
  <img className='ui avatar image' src='images/avatars/liz.png' />
</div>
to >>
<div className='extra'>
  <span>Submitted by:</span>
  <img className='ui avatar image' src={this.props.submitterAvatarUrl} />
</div>
The resulting component should look like the following:
class Product extends React.Component {
  render() {
    return (
      <div className='item'>
        <div className='image'>
          <img src={this.props.productImageUrl} />
        </div>
        <div className='middle aligned content'>
          <div className='description'>
            <a>{this.props.title}</a>
            <p>{this.props.description}</p>
          </div>
          <div className='extra'>
            <span>Submitted by:</span>
            <img className='ui avatar image' src={this.props.submitterAvatarUrl} />
          </div>
        </div>
      </div>
    );
  }
}
This may look odd at first, seeing JavaScript directly inline with html, and that is in fact the beauty of JSX! The
{}braces identify that what is within them is a JavaScript expression. Therefore the props object of the<Product>component(remember just a JavaScript class).You will notice immediately that the rendered
<Product>is currently empty as there are no props being passed in to the component now to every data field is in fact empty. Let’s fix that and get your hands on some data.
Understanding seed.js and the window
Take a look back at the
seed.jsfile that should be open at this time, if it is not do open it now. This is where our data is going to come from!Let’s walk through this file one step at a time …
Note
JavaScript exposes a top level object accessible with the
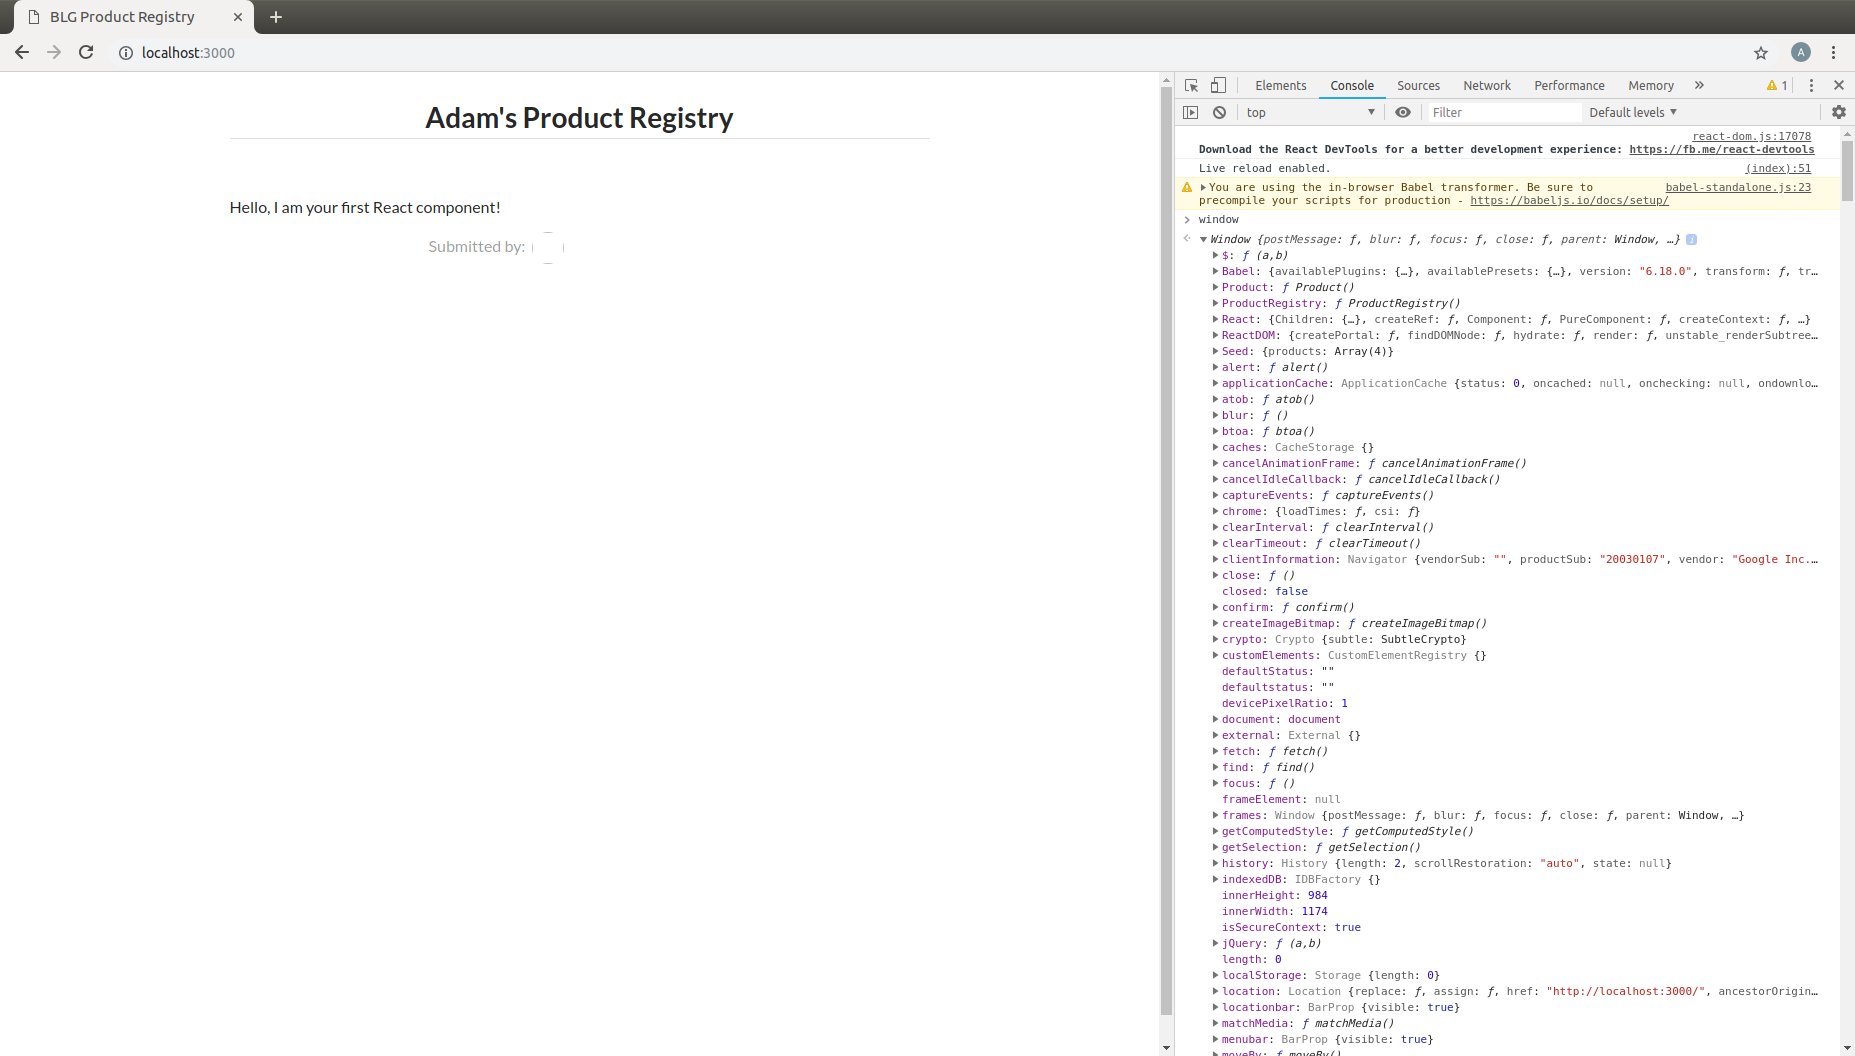
windowkeyword which represents the browser window. This object contains many functions and properties about the given browser session and also allows you as a developer to bind data to the window that may be globally accessible.Let’s have a look at this
windowobject directly in the browser to see what it is all about.- Right-click in your browser and in the dropdown menu select inspect.
- Within the console type
windowand hit enter. - You will see a reference to the global
windowobject, expand this and have a look around. This is the top level object that JavaScript natively exposes.
The first line of
seed.jsis in fact accessing thiswindowobject and adding an attribute to it:Seed.window.Seed = (function () {...});
This attribute is set to a
function()and this function returns an object:{ products: products }. Resulting in:window.Seed = { products: products }Where
productsis your array of product data fields:const products = [ { id: 1, title: 'Digi-Collectibles', description: 'The rarest digital collectibles.', votes: generateVoteCount(), submitterAvatarUrl: 'images/avatars/adam.jpg', productImageUrl: 'images/products/image-aqua.png', }, ... ]
Have a look at this attribute back in the browser.
In the browser console type
window.Seedand you will see the result!Yes, all of your data has been loaded and is availble globally attached to the
windowobject.In fact every
windowattribute is accessible without thewindowkeyword as they are added to the global scope of the application. Therefore this object may simply be accessed globally via justSeed.> window.Seed > {products: Array(4)} > Seed > {products: Array(4)}
Loading a product from the Seed
Now it is time to utilize this seed data to populate your
<Product>Within the
<ProductRegistry>component load the first product of the Seed data into a local variable. Remember it is the parent that must pass the data to the child,<Product>, as props.class ProductRegistry extends React.Component { render() { const product = Seed.products[0]; return ( <div className='ui unstackable items'> Hello, I am your first React component! <Product /> </div> ); } }Pass the seed data to the
<Product>component as props:<Product title={product.title} description={product.description} submitterAvatarUrl={product.submitterAvatarUrl} productImageUrl={product.productImageUrl} />
You can also get rid of the “Hello…” line that is currently in the
<ProductRegistry>resulting with the following component:class ProductRegistry extends React.Component { render() { const product = Seed.products[0]; return ( <div className='ui unstackable items'> <Product title={product.title} description={product.description} submitterAvatarUrl={product.submitterAvatarUrl} productImageUrl={product.productImageUrl} /> </div> ); } }You should see the data from the first product in the
seed.jsfile rendered!

7. Loading the Entire Product Registry
- This section will aid to highlight the beauty and power of the portable and modular nature of React components!
- You will now load all of the seeded products into the registry.
- Within the
<ProductRegistry>component now instead of just loading the first product in the array iterate over the entire list. In order to do this you will leverage the internalmapfunction of the JavaScript language.
Note
JavaScript’s map function
array.map(function(currentValue, index, arr), func())
map is a function that is accessible on every array object. This function essentially allows efficient iteration over all of the array components.
For example:
> const myArray = [1,2,3,4]
> myArray.map(arrayItem => console.log(arrayItem))
1
2
3
4
Instead of loading just the first product from the seed now iterate over all the products and define a
<Product>component to be rendered for each:remember anything between
{}allows you to use native JavaScriptreturn ( <div className='ui unstackable items'> { Seed.products.map(product => <Product title={product.title} description={product.description} submitterAvatarUrl={product.submitterAvatarUrl} productImageUrl={product.productImageUrl} /> ) } </div> );
Now you will notice an error in the browser console stating:
Warning: Each child in an array or iterator should have a unique "key" prop.The use of the
keyprop is something that the React framework uses to identify each instance of the Product component.For the time being just remember that this attribute needs to be unique for each React component.
Add a
keyandidprop to the<Product>component:<Product key={'product-'+product.id} id={product.id} title={product.title} description={product.description} submitterAvatarUrl={product.submitterAvatarUrl} productImageUrl={product.productImageUrl} />
Resulting with the final
<ProductRegistry>component:class ProductRegistry extends React.Component { render() { return ( <div className='ui unstackable items'> { Seed.products.map(product => <Product key={'product-'+product.id} id={product.id} title={product.title} description={product.description} submitterAvatarUrl={product.submitterAvatarUrl} productImageUrl={product.productImageUrl} /> ) } </div> ); } }And all seeded products should be rendered!

8. Voting for a Product - Dynamically Updating the UI
This section will allow you to vote on your favourite products. Interacting with the application and dynamically up it!
You will learn how to manage interaction with your components and how to dynamically update data that is stored in a component’s state.
Begin by updating the product component to show its current number of votes as well as a button to click on to vote for that product.
<div className='header'>
  <a>
    <i className='large caret up icon' />
  </a>
  {this.props.votes}
</div>
Resulting in the following
<Product>component:class Product extends React.Component { render() { return ( <div className='item'> <div className='image'> <img src={this.props.productImageUrl} /> </div> <div className='middle aligned content'> <div className='header'> <a> <i className='large caret up icon' /> </a> {this.props.votes} </div> <div className='description'> <a>{this.props.title}</a> <p>{this.props.description}</p> </div> <div className='extra'> <span>Submitted by:</span> <img className='ui avatar image' src={this.props.submitterAvatarUrl} /> </div> </div> </div> ); } }Notice that
this.props.votesis being accessed but is not currently being passed in by the parent<ProductRegistry>.Update the
<ProductRegistry>to also pass in votes as a prop:votes={product.votes}Resulting in the complete
<Product>definition:<Product key={'product-'+product.id} id={product.id} title={product.title} description={product.description} submitterAvatarUrl={product.submitterAvatarUrl} productImageUrl={product.productImageUrl} votes={product.votes} />
Time for some interaction!
When the voting caret is clicked we want to increment the product’s total vote count.
In order to do this we need to register the event when the given product is clicked.
React features many built-in listeners for such events. In fact an
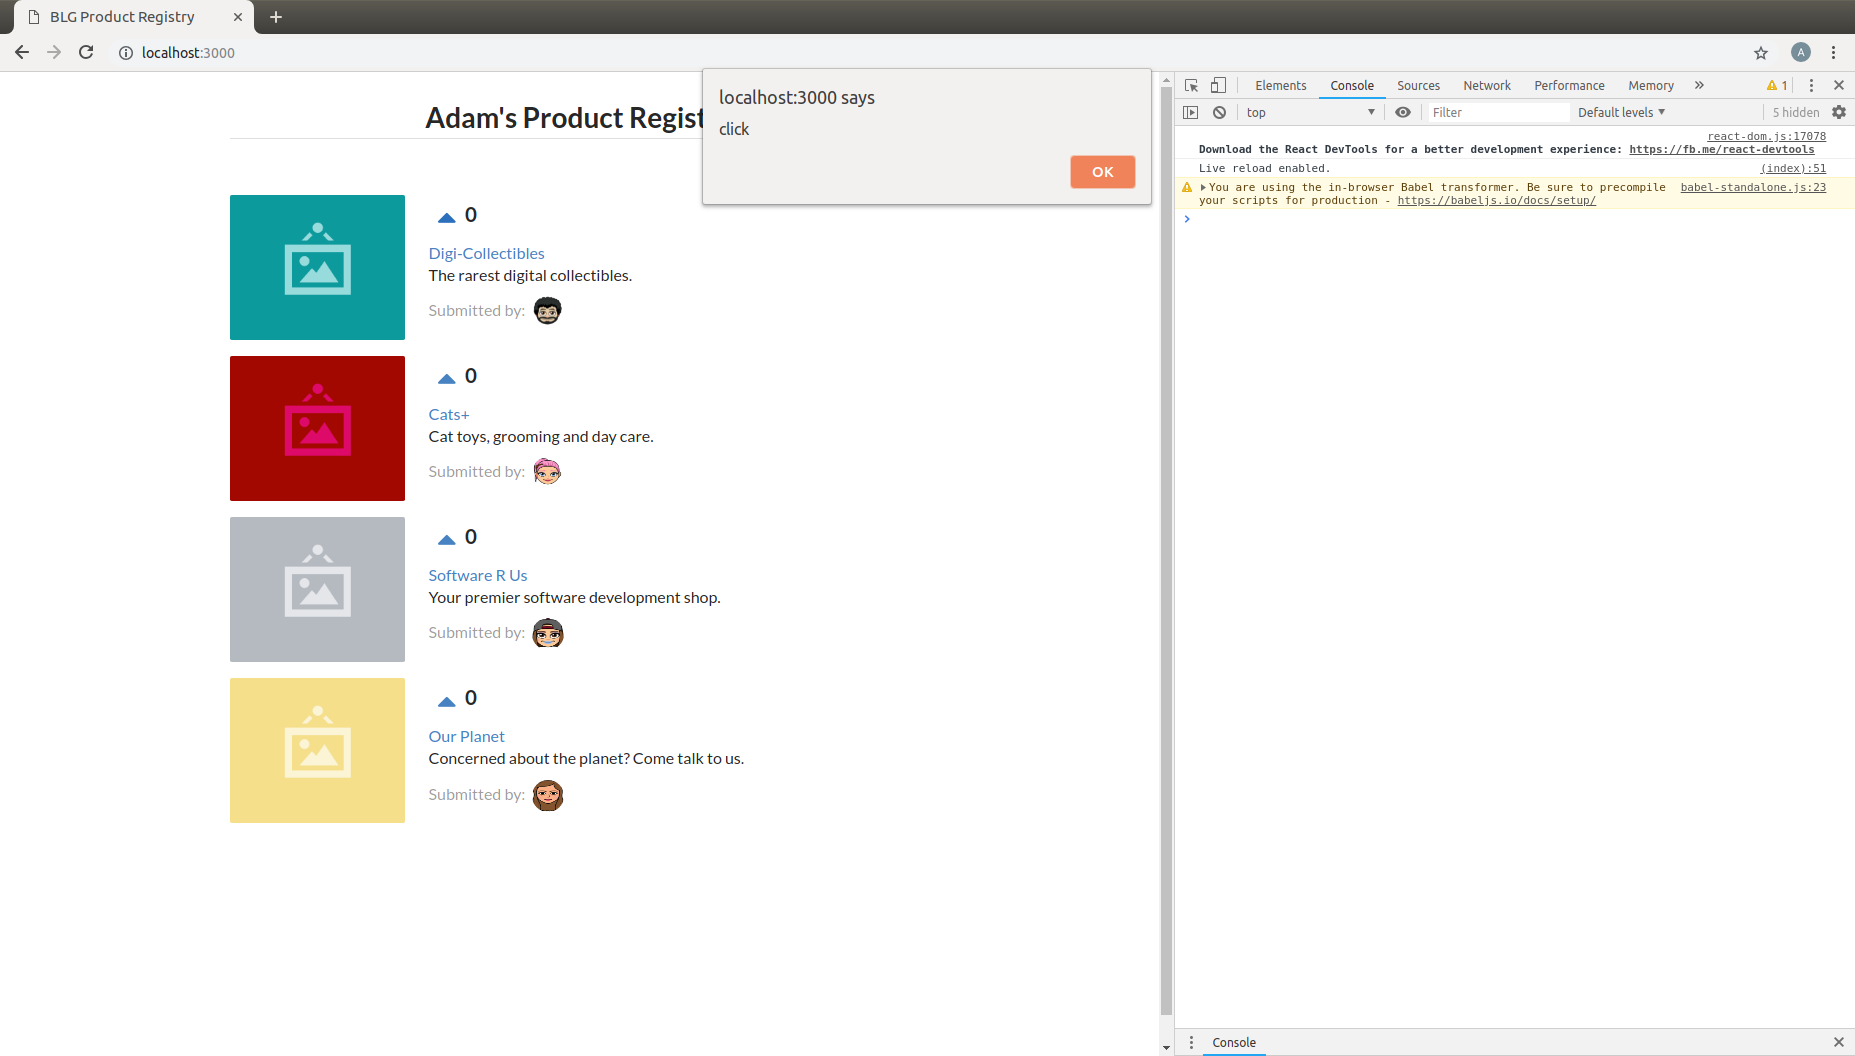
onClickprop exists that we can access directly.Within the definition of the caret in the
<Product>component add theonClickprop and create an alert whenever a click occurs.<div className='header'> <a onClick={() => alert('click')}> <i className='large caret up icon' /> </a> {this.props.votes} </div>Resulting in the following
<Product>component:class Product extends React.Component { render() { return ( <div className='item'> <div className='image'> <img src={this.props.productImageUrl} /> </div> <div className='middle aligned content'> <div className='header'> <a onClick={() => alert('click')}> <i className='large caret up icon' /> </a> {this.props.votes} </div> <div className='description'> <a>{this.props.title}</a> <p>{this.props.description}</p> </div> <div className='extra'> <span>Submitted by:</span> <img className='ui avatar image' src={this.props.submitterAvatarUrl} /> </div> </div> </div> ); } }Try it out!
- Now we need to update the number of votes that the clicked on product currently has every time that caret is clicked.
Note
The props of a given component are not owned by the child component itself but instead are treated as immutable, or permanent, at the child component level and owned by the parent.
So the way you currently have your components setup, parent <ProductRegistry> passing in the votes prop to child <Product> means that
the <ProductRegistry> must be the one to update the given value.
Therefore, the first order of business is to have this click event on the <Product> propagated upwards to the <ProductRegistry>. React
allows you to not only pass data values as props but functions as well to solve this problem!
Add a function within your
<ProductRegistry>component to handle the event when a vote is cast:handleProductUpVote = (productId) => { console.log(productId); }Pass this function to each
<Product>as a new prop calledonVoteonVote={this.handleProductUpVote}Resulting in the complete
<ProductRegistry>:class ProductRegistry extends React.Component { handleProductUpVote = (productId) => { console.log(productId); } render() { return ( <div className='ui unstackable items'> { Seed.products.map(product => <Product key={'product-'+product.id} id={product.id} title={product.title} description={product.description} submitterAvatarUrl={product.submitterAvatarUrl} productImageUrl={product.productImageUrl} votes={product.votes} onVote={this.handleProductUpVote} /> ) } </div> ); } }Update the
<Product>to no longer raise the alert but instead call itsonVoteprop, pass the id of the clicked component in order to determine where the event occured to cast the vote correctly:<a onClick={() => this.props.onVote(this.props.id)}>Resulting in the complete
<Product>:class Product extends React.Component { render() { return ( <div className='item'> <div className='image'> <img src={this.props.productImageUrl} /> </div> <div className='middle aligned content'> <div className='header'> <a onClick={() => this.props.onVote(this.props.id)}> <i className='large caret up icon' /> </a> {this.props.votes} </div> <div className='description'> <a>{this.props.title}</a> <p>{this.props.description}</p> </div> <div className='extra'> <span>Submitted by:</span> <img className='ui avatar image' src={this.props.submitterAvatarUrl} /> </div> </div> </div> ); } }Try it out! Noting the id of the product logged to the browser developer console, 1,2,3 or 4, and successfully the event has been propagated upward to the parent component!
Introducing: The State!
Note
Props as we defined earlier are seen as immutable by a component and owned by a it’s parent.
State is instead owned by the component itself private to that component.
The state of a component is in fact mutable and accessible via a function provided by the React.Component base class called this.setState().
And it is with the call of this.setState() that the component will also no to re-render itself with the new data!
Begin by defining the initial state of the
<ProductRegistry>:state = { products: Seed.products };Update the
renderfunction to now read from the component’s state instead of the seed file directly:Resulting in the complete
<ProductRegistry>:class ProductRegistry extends React.Component { state = { products: Seed.products }; handleProductUpVote = (productId) => { console.log(productId); } render() { return ( <div className='ui unstackable items'> { this.state.products.map(product => <Product key={'product-'+product.id} id={product.id} title={product.title} description={product.description} submitterAvatarUrl={product.submitterAvatarUrl} productImageUrl={product.productImageUrl} votes={product.votes} onVote={this.handleProductUpVote} /> ) } </div> ); } }
Important
Never modify state outside of this.setState() !
State should NEVER be accessed directly, i.e. this.state = {}, outside of its initial definition.
this.setState() has very important functionality built around it that can cause odd and unexpected behaviour if avoided. Always use this.setState()
when updating the state of a component.
Now although we noted earlier that props are seen as immutable from the given component and state mutable a slight variation to that definition must be explained
Yes, the state may be updated, but the current state object is said to be immutable, meaning that the state object should not be updated directly but instead replaced with a new state object
For example directly updating, mutating, the current state is bad practise!
// INCORRECT!
this.state = { products: [] };
this.state.products.push("hello");
Instead a new state object is to be created and the state update to the new object.
// CORRECT!
this.state = { products: [] };
const newProducts = this.state.products.concat("hello");
this.setState({ products: products });
Therefore when we want to update the state when a vote has been cast we need to:
- Create a copy of the state
- Map will return a copy of each item in the array it will not reference the existing.
const nextProducts = this.state.products.map((product) => {
  return product;
});
- Determine which product was voted for
if (product.id === productId) {}
- Mutate the copy of the state incrementing the product’s vote count
- Create a new product Object via
Object.assignand update thevotesattribute of that object to +1 of the existing product
return Object.assign({}, product, {
  votes: product.votes + 1,
});
- Set the state to the new object
this.setState({ products: nextProducts });
Resulting in the following segment added within the
handleProductUpVotefunction of the<ProductRegistry>to update the vote count of a selected product identified by itsid:const nextProducts = this.state.products.map((product) => { if (product.id === productId) { return Object.assign({}, product, { votes: product.votes + 1, }); } else { return product; } });
Resulting in the following complete
<ProductRegistry>:class ProductRegistry extends React.Component { state = { products: Seed.products }; handleProductUpVote = (productId) => { const nextProducts = this.state.products.map((product) => { if (product.id === productId) { return Object.assign({}, product, { votes: product.votes + 1, }); } else { return product; } }); this.setState({ products: nextProducts }); } render() { return ( <div className='ui unstackable items'> { this.state.products.map(product => <Product key={'product-'+product.id} id={product.id} title={product.title} description={product.description} submitterAvatarUrl={product.submitterAvatarUrl} productImageUrl={product.productImageUrl} votes={product.votes} onVote={this.handleProductUpVote} /> ) } </div> ); } }Give it a shot!
